Monday, October 17, 2016

Homestead Green Building: Wattle and Daub

Wattle and daub buildings trace all the way back at least 6,000 years.  It is definitely one of the oldest building styles, found the world over.  There are some that say that more common techniques, such as cob and adobe, are developments that came out of wattle and daub building.  So what is wattle and daub?  Within  a timber framework, a network of lattice is made from some form of flexible sticks between the timbers.  This is the wattle.  An earthen mixture similar to cob is then "daubed" into the lattice/wattle.  While the mix is similar to cob, it can easily be adapted to whatever elements you have on hand that can create the same type of effect.  Generally speaking, the mix tends to consist of dirt, clay, plant material, straw, and animal dung.


Now, I've looked at many different sources, and there does seem to be some conflicting information, or at the very least, conflicting opinions, when it comes to wattle and daub.  While most agree on the basics, here is where the conflict arises.  Some say that there are two main downfalls to using wattle and daub as exterior walls.  Those downfalls are 1) that it simply isn't strong enough to be used for load-bearing purposes, and 2) that these walls are so thin that they don't provide any good thermal or insulating properties.  Others disagree with both of those.  I think the main difference between determining which side is more likely to be accurate would depend on what wood you are using for your primary timberwork framing.  If you use thin, flexible wood for the frame, then yes, you are going to have a lot of give if weight is added on top of it.  And being thin, no, it wouldn't provide much insulation or thermal mass.  You can easily make these walls as thick as you would like.  Just remember that part of the beauty of a wattle and daub wall is in it's flexibility.  The wall has to be able to give a little  if it needs to adapt to changing conditions.  And the wattle within the walls can actually help to stabilize the overall structure when other timbers may become impaired.  Also, the thermal mass and insulating properties can be increased based both on what mix you ultimately use as the daub, as well as how thick of a wall you end up with.  But because there are differing opinions from people who most likely know a whole lot more than I do, I will include a list of some of my references at the end of this post for you to read through, and come to your own conclusions.


One thing that is consistent is that you should not ever - NEVER - use anything such as cement or modern paints and sealants that create rigidity and hinder air flow.  Wattle and daub are designed to be flexible.  To include materials that would hinder that flexibility would actually cause the walls to degrade and crack.  It must also be able to breathe.  Any moisture that should get trapped in the wall needs a way to escape.  Otherwise, the wood inside will rot.  Lime plaster and and/or lime washes are what is recommended with this type of building.  Yes, it will mean the upkeep and reapplication may be more often.  But with regular and proper maintenance, these buildings can last several hundred years, at least.


Wattle and daub is not common in the U.S.  It is, however, still commonly used in other parts of the world.  It's easy to identify in most cases.  It has a rustic feel to it.  The walls tend to wave, and even the roofline can be uneven.  This can add to it's charm.  It can also be made smooth (relatively speaking) by plastering the walls with the same mix used as the daub.  This is recommended so as to encase the timber frames, giving them extra protection from the elements.


Another beautiful aspect to this type of building is that it can be used to make an entire wall, or to make individual panels that are then put into place wherever they are wanted/needed.  Again, it is very flexible.

The last thing I want to address is the use of animal dung.  For me, this was a big "HUH?!"  That sounds gross.  I use it in my garden as compost, yeah.  But to have it built into the walls of your home?  Does it smell?  Well, to address that,  I give you this site.  They explain it way better than I ever could.


Wattle and daub is a beautiful and natural building technique that should be considered in your research.  It has a long history.  And so long as you don't mind the upkeep, it can last for a very long time, and be beautiful and charming to boot.  For more information, here is the list of resources I mentioned earlier.  Happy researching!


https://www.britannica.com/technology/wattle-and-daub

http://www.buildingconservation.com/articles/wattleanddaub/wattleanddaub.htm

https://primitivetechnology.wordpress.com/2015/07/07/building-a-wattle-and-daub-hut/

http://www.earthhomesnow.com/wattle-daub-homes.htm

http://www.motherearthnews.com/green-homes/build-structures-using-ancient-method-zbcz1404

http://www.thatched-group.com/articles/building/UnderstandingOrganicBuildings.htm

http://permaculturenews.org/2013/04/26/bamboo-wattle-and-daub-structures/

http://www.energyauditingblog.com/wattle-and-daub-the-ancient-wall-made-modern/


Monday, October 10, 2016

Homestead Green Building: Earthbags

So I was planning on writing about a different type of building this week as kind of a continuation of sorts from last week.  However, I live in Florida, and we just experienced Hurricane Matthew.  I had a very interesting conversation with a friend of mine, and we were discussing the devastation that happened in Haiti from this storm.  That conversation brought this building style to the forefront of my mind.  Let me tell you why.  My heart breaks for the people down there.  In fact, it breaks for any and everyone who lost all or part of their homes.  This particular building style is something quite special.  Earthbag buildings have been said to be hurricane-proof, earthquake-proof, and even bullet-proof.  There were a number of earthbag homes built in Haiti after the earthquake there not too long ago.  And in the aftermath of the large earthquake in Nepal, those buildings that had been built with earthbags were found to still be standing intact, while traditional-built buildings had completely collapsed.  Also, they are much less expensive to build than standard housing.  The only real cost is that of the bags and barbed wire.  And those can be acquired inexpensively, or even through barter in some cases.  These homes are ideal for areas prone to these kinds of natural events.


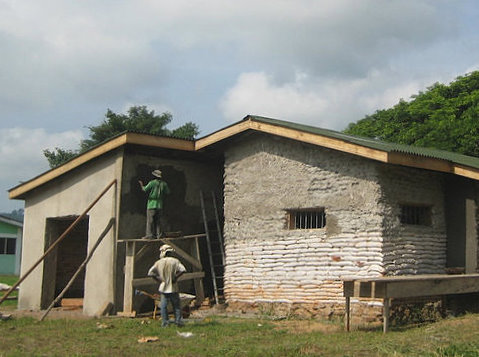
So what is earthbag building?  Well, it's pretty much exactly what it sounds like.  Earthbags, also referred to as sandbags (yes, the same kind used for protection against flooding), are filled with natural materials, and used to construct the building.  The bags can be filled with pretty much any natural substance, readily found on the property.  What you fill them with can determine their ability, if you will.  When filled with gravel, they can be used as a foundation layer to keep moisture away from your structure.  When filled with pumice, vermiculite, or something similar, they can act as a great insulating wall.  And when filled with soil, they make a great thermal mass.  See here for more information on that.  When the soil is moistened before being put in the bag, it can be referred to as "superadobe", a term that is credited to Nader Khalili at the California Institute of Earth Architecture.  Learn more about him and superadobe here.  This technique is also generally used with longer, earthbag tubes.  It can, however, be used with smaller bags, as well.  As far as which type of bag you choose to use in your structure, there are a lot of people with a lot of opinions.  The simplest answer is use what you are comfortable with.  Longer tubes may be difficult for only one or two people to handle, whereas smaller, individual bags can be done by one person.  Tubes are generally recommended when creating dome like structures.


To build an earthbag structure, it's really as simple as laying a row of bags, tamping them down, lay barbed wire, which holds the bags together, then lay the next row, and so on.  There may be some extra engineering involved to help brace the walls if you are planning on building underground, earth-sheltered or earth bermed.  But they are very suitable to such building designs.  These buildings are also versatile in that they can be rectangular, as with a traditional home, or circular, like a roundhouse.  Also, remember to include any framework for windows and doors right into the walls as you build them.  For the most part, the bags are all you need, with the barbed wire.  That can change with some factors.  If you are planning underground, especially completely underground, you may want to include a good wood or steel framework within the walls.  That may also be warranted if you want a green roof or have the possibility of heavy snow loads.  Also consider the shape of your roof.  Traditional roofs are a good design for green roofs, whereas domes can work great in just about any other situation.  And as for electrical and plumbing, they can be built straight into the walls, just as with cob.


To finish, it's a simple matter of choosing what kind of plaster you want to use, both on the interior and exterior.  Some people opt for traditional plaster, some use a cement plaster, while others use cob.  Of course, you don't have to use the same materials on both.  It's all up to you.  Again, though, remember that you may also need to consider weather/water-proofing.


The next question will most likely be how to determine how many earthbags you will need.  The answer will vary depending on the size of bags you wind up getting.  There are a number of different sizes available.  But to get a basic idea on determining how many, check here and here.  Once you determine how many you will need, there are a number of places to get them.  Sometimes, you can find them on eBay for a decent deal.  Sometimes, you may be fortunate enough to find them on Craigslist or even for free on sites like freecycle.org.  If you cannot find them there, you can always purchase them.  On occasion, some home improvement stores may carry them.  At the end of this post, you will find a short list of a few companies which sell these bags online.


This is a great green building technique that can be learned quickly and easily, and has the advantage of being easily built by either a large group, a few people, or even a single individual.  It is economical, environmentally friendly, and inexpensive.  It is versatile enough to be worked into just about any other building design, or as a stand alone structure.  There are many many benefits to building an earthbag home.  It is well worth the time to research it, truly consider it, and even find a workshop, if at all possible.  For more general information on earthbag building, here and here are good places to start.  And never forget to search youtube.  There are tons of tutorials there.  Happy researching!

Bag suppliers:

http://bagsupplies.ca/

https://www.onlinefabricstore.net/18-x-30-polypropylene-bag-.htm?gclid=CNyDiYSDqc0CFQgaaQodmbwIgA

http://www.chkbag.com/

http://www.earthbaghome.com/node/2

http://www.allinsafety.com/sandbags.aspx


Monday, October 3, 2016

Homestead Green Building: Cob, Adobe, and Rammed Earth

Yes, I am including all three of these building styles into one post.  Why?  Well, the simplest answer is because there is very little difference between them.  They can vary, of course, with different things added into the mixture, but the basic underlying mix of each is the same.  These are, by far, the least expensive green building styles that you will come across.  After all, they are essentially just dirt.  You will have that in abundance pretty much anywhere you go.  You will, however, have to perform a test of sorts to determine the make-up of your soil.  Don't worry.  It's not a hard test.


To see how much sand and clay you have in your soil, do a simple shake test.  Dig down beneath your topsoil to get to what's underneath.  That's what you want to test.  Get a jar, and fill it about a quarter of the way up with your soil.  Top it off with water, and put the lid on.  Now, shake the dickens out of it.  You want to thoroughly separate the sand from the clay.  Once it's all shaken up, set it on a flat surface to let it settle.  The sand will settle first (unless you have heavier particles like gravel), and will do so pretty quickly.  The clay will take a bit longer, possibly even a week or more.  Once everything has settled, you can easily see the makeup of your soil.  The first layer is sand, then you may have a thin dark layer of silt, and then the top layer will be clay.  The best make-up of your soil for the greatest benefits will vary based on the type of clay (some are more sticky than others)  As a general rule, you want more sand than clay, but the ratios's can be anything from 1:1 to 1:25.  It just depends.  So after you know what you have, do a few small test bricks with different ratios, adding just enough water to make it like a yogurt consistency, to see which one works the best.  Too much clay, and you'll get cracks as the mix dries and shrinks.  Too much sand, and it will essentially crumble.  You can always purchase (or scavenge) more of either to add if needed.  Beyond that, the simplest thing is to leave the mix as is.  It can be used this way.  However, most experts will encourage you to add something else to mix for added strength if building a home or, really, anything much bigger than a small sculpture.  The most common additive at this point is straw.  This will help bind and strengthen the mixture, making it much more durable for bigger projects (like walls).  There are some who would suggest to add cement, ash, gravel, and even ground granite.  Granted, I am no expert.  But I would tend to believe that the straw would be enough for most projects, simply because that is what most experts focus on, and it's easy enough to obtain.


So what, exactly is the difference between the three building styles?  Simply put, cob is free-form.  It is built up onto itself without the use of forms.  It is easy to get creative here with curved walls, organic shapes, and even sculpture built right into your walls.  Adobe is the same mixture only formed into bricks, and laid out to dry in the sun.  Then they are layered, as you would masonry bricks, using the same base mix as the mortar.  If you like the look of a brick wall, but want it to be a little less expensive, this could be your bet.  Rammed earth is, again, the same basic mix, only this time, it is packed into wooden frames, one layer at a time, until the wall is completely built.  All of these options can be adapted to as thick or thin as you'd like.  However, thicker is generally better for supporting heavier loads.  Think of load-bearing walls needed to support the roof.


Another thing that all three of these options have in common is the basic care, both in the construction and maintenance.  In construction, it is important to remember that these are all made out of earth.  While they can very easily last a few centuries if properly taken care of, they will need a little protection to keep them from wearing away.  A little moisture won't do too much.  However, the idea is to keep excess moisture away from your structure.  You must start with a good foundation. In an earthen structure, it all begins with digging a trench around the perimeter of your future structure.  Your exterior walls will eventually sit on top of this trench.  The bottom should reach down to the frost line.   Fill the trench with gravel or small stones to help drain water through.  Some experts also suggest laying a polyethylene (pvc) pipe into the bottom of the trench, drilled with holes, in order to help the drainage.  Above this, will be what's called a stemwall.  This gives the wall above something solid to sit on, and keeps it from having direct contact with the ground.  You can use found stones, buy stones, bricks, concrete blocks, or even use recycled concrete pieces if you can find them.  Your cob/adobe/rammed earth sits on top of this.  Then, after you build the wall, you also need to protect it on the top with a good overhang.  There's not really a set size for the overhang, but the general rule is the bigger is better.  It needs to come out over the wall far enough to give it really good protection from any moisture that may come in from above.  I've seen everything from 10 inches to a few feet.  Just make sure it's solid and gives good coverage to the wall.


If you are building in a dry climate, you may be able to stop there.  However, it's always a good idea to put a good waterproofing layer on your earthen walls.  A lime-sand plaster is generally the most common, and it works very well.  There are currently some earth builders who are experimenting with something called waterglass (sodium silicate).  It's been known for quite sometime, but for this particular use, it has mixed results.  There is also a technique that is commonly used called tadelakt.  An ancient technique from Morocco, this is a lime plaster that is sealed with a black olive oil soap.  I'll get into this one a little bit more in a later post discussing interiors.  A good seal is important to any exterior wall, but remember to add an extra couple of layers to any portion that may have need of more protection.  For example, if you are building in an area that snows, you want to make sure that the bottom of your walls have that extra protection.  Of course, ideally, you'd want to set up some way in which the snow won't sit in direct contact with the walls.  These water-resistant methods can also be used for sinks and bathtubs.  Believe it or not, you can even have a cob swimming pool for much less money than a traditional pool.  Something to think about.  But again, I'll get a bit more into that later on.


You're probably now asking just how long will this take to dry, right?  Well, there's really no easy answer to that. There are few factors, such as climate, water in the mix, and thickness of your walls, that will alter the timeline.  In a very arid climate, it may dry so fast that you have trouble keeping up.  Whereas, in a wetter environment, it can seem like it takes forever.  But remember that while it may take longer to dry, this is going to be both the interior and exterior surfaces, and the internal structure of the wall, all in one.  Also, plumbing and electrical can be built right into the walls as you go.  So yes, it may take longer to build, but when you're done, you've already got all that other stuff already finished, too.


One thing that is very important to remember when using earthen materials for your walls, is that these are great for thermal mass, but are not insulation.  Whereas insulation keeps heat or cold in or out, what thermal mass does is it absorbs heat and then releases that heat slowly as the surrounding air cools.  It works beautifully in designs that include the use of passive solar.


These are easy techniques to learn and even master.  An earthen structure can be done by just about anyone with the will and time to devote to it.  Look to see if there are any workshops that you can attend to get good, hands-on experience, and you'll feel like a master in no time.  As far as building codes and guidelines, well, those are hard to pin down in one single post.  Some areas have strict guidelines, where other areas have practically none in regards to earthen structures.  So be sure to look up your specific area to find out for sure.


I will tell you that even if none of these building techniques seem right for you, mixing cob could still come into play in other types of green building.  It's great as a outer coat for straw bale and earthbag structures (which will be discussed in upcoming posts), and is also a great mortar for cord wood (also upcoming), and bottle brick walls we talked about  with earthships a couple of weeks ago.  There are so many uses, that it's just a good technique to learn.


There are a great number of resources out there for more detailed information.  The main source that I would highly recommend is here.  The lady who does this page is Sigi Koko, and I will tell you that she is so full of information, knowledge and wisdom, that you may not even need another source.  She is an expert in multiple types of green building and techniques.  Follow her on Facebook, Twitter, and YouTube.  I promise that you won't be sorry.


Monday, September 26, 2016

Homestead Green Building: Underground and Earth Sheltered Homes


Would you like to live like a mole, or some other burrowing creature?  Awesome!  But that's not what I'm going to talk about.  I'm going to talk about a green home design that has all the benefits of being below ground, but also has lots of windows and light so you don't feel like you're hibernating all the time.  Actually, there are several variations that tend to accomplish the same thing.  The beauty, and the main differences between these techniques is little more than a matter of how much money you want to spend, and much of the work you are willing to do yourself.


People across the face of the earth have been building homes underground or earth covered pretty much since the beginning of people building homes.  From the native Pueblo people digging into hillsides, to the ancient tunnels/homes dug beneath Turkey.  This is- by far- not a new concept.  Now me.... I like caves.  I like the dark.  But I also love opening windows to let fresh air circulate (when weather permits, of course).  And I do, occasionally like letting in a little sunlight.  With an underground home, you can create it to be however dark or light as you like.  Or, if you live with another person who maybe likes it a bit different than you do, it's a very simple thing to work in both lighter and darker spaces, making everyone happy.  Now, most homes described as "underground", really are more or less not.  They can be built partially underground, they can be built above ground with a green roof, they can be built with a surrounding earth berm, as in the earthship design we looked at last week.  But they are all generally referred to as underground homes because a good portion of the insulation and thermal mass comes from the earth itself.


There are a number of methods, designs, materials that can be used.  Like I said above, it all comes down to how much money you want to spend.  I have yet to come across a method that is completely free.  But I'm sure it could be done if you are fortunate enough and willing to do a lot of bargaining for whatever you need.  But the basic principles are pretty much the same across the board.  The biggest concern, no matter the design, will be moisture.  There is a certain amount of moisture naturally within the earth.  There will inevitably be moisture in the form of humidity, rain, and in some regions, snow.  So a really good moisture barrier is essential.  That, and a good design so that when rain and/or snow does fall, it's not going to be trapped right up next to your home, eventually resulting in mold, mildew, rot, or whatever else comes along with water damage.  Once you've got that part of the design figured out, the rest is pretty straightforward and easy peasy.  Dig out where you want your home.  Place a layer of moisture barrier down to keep it from coming up through the floor.  Place your floor.  Build your home.  Put down another layer of moisture barrier outside the home.  Then, depending on your climate and design, you can add insulation, another moisture barrier, and however much earth you want on top of that.  You can use reinforced steel and concrete, like this home.  Or you can go as simple as wood, dirt, and some form of water barrier.  One of the most likely names you'll come across in your hunting will be that of Mike Oehler.  I would highly HIGHLY recommend you read his book "The $50 and Up Underground House Book".  There is such a great wealth of information in there, especially if you want to save as much money as possibly in building your home.  In between these two opposite ends of the spending spectrum, there are many other options as well.  You can even buy land with an old abandoned missile silo to build your home into.  Or take one of the concepts discussed in the "temporary home" posts from a few weeks ago, like the shipping container or one of the prefab designs, and throw it underground.


I am not going to go into any more detail.  There is, once again, way too much information out there, and other people that can explain it much better than I can.  My job is to simply point you in the right direction from which to start your search.  So I am going to end this post with the sites I've gone to to find most of my information that began my research hunt on underground and earth sheltered homes.  All in all, this is a good option for the ultimate in privacy, and for reducing heating and cooling costs.  Don't overlook this idea simply because of some images in your mind of dark and dank places.  They truly can be light and beautiful.

http://opensourceecology.org/wiki/Underground_Housing

http://www.offthegridnews.com/grid-threats/the-surprising-facts-about-earth-sheltered-living/

http://www.underground-homes.com/earth-sheltered-homes.htm

http://www.offgridquest.com/index.php?/homes-dwellings/building-methods/the-newest-cave-in-these-400-million-yea

http://www.offgridquest.com/homes-dwellings/home-stylings/underground-build

https://richsoil.com/wofati.jsp

http://www.burrowbureau.com/missile-silos-underground-homes.htm

http://www.undergroundhousedesigns.com/hello-world/


Monday, September 19, 2016

Homestead Green Building: Earthships


This week, we're going to start looking at green building styles.  There are several.  When you are going the route of building your own home, and doing so on a homestead that you want to be off grid, the best way to go about that is to look at green building.  The reason is simply because green building is not only better for your health, and that of the planet.   They will also help significantly with the energy system you choose to use, lowering the amount of overall energy you will consume.  New technologies and building methods have come a very long way in recent years.  But they still don't do the job nearly as well as green methods.  So let's look at some options.


I'm going to start off with an option that you may or may not have heard about: earthships.  While similar ideas have been around for a long time, and have taken on different forms, "earthships" themselves, is an idea and design created by architect Michael Reynolds.  They seem to be based on the concept of a solar pit house.  I'm starting here because I love the concept, and there are a lot of ideas that go into an earthship that can easily be implemented into other building styles.  Earthships are a bit controversial as to the overall sustainability and design.  The basic concept is simple.  There is an outer wall of recycled tires, filled and pounded with dirt, that goes around the back and sides of the building.  A water barrier is placed on the outside of the tires, and then an earth berm is backfilled against this wall.  A metal-framed dome (generally) is placed over the top of the individual rooms for the ceiling/roof.  The front of the house is a wall of glass windows, creating a greenhouse within the house itself.  A "bottle brick" wall is what connects the window wall to the tire walls.  Bottle bricks are either glass bottles that have been cut, and then two bottle bottoms are sealed together at the open edge, thus creating the "brick"; or they an be plastic bottles filled with earth.  These are then placed into a cob wall, or other similar type wall.  This makes the building of the wall itself move quicker, and at the same time, if glass, lets extra light into the space in a colorful and creative way.  There are so many variations of the design, that you can build just about anything you want.  They can be huge, two-story homes, or small and simple.  It's all up to you.


The controversial part tends to focus around two key components of the earthship.  The first is the use of recycled tires.  First off, it is very hard work to do this part of the build.  On average, it takes up to about 2 hours per tire, from what I've read.  They must be placed perfectly, filled with dirt, pounded, leveled, filled, pounded, leveled, filled, and so on.  The tires must be solid and not move at all.  It is hard labor, and easily the toughest and most time consuming part of the entire build.  But what makes it controversial is the debate over whether or not there is any off-gassing from the tires.  There are some studies and experts that say that concealing the tires will cause a build up of gases over time, creating a toxic environment.  At the same time, there are just as many studies and experts that say the tires will only off-gas when outside in the elements and exposed to heat and sunlight.  But once they are filled and surrounded with earth, that danger no longer exists.  So for me, it all comes down to one question: what are you comfortable with?  If you are comfortable with using the tires, go right ahead.  You can generally find them free or cheap from dumps and landfills, or even offer to take them off the hands of shops that would otherwise have to pay to have them hauled off.  They don't have to be in perfect condition.  You're not driving on them.  They just have to still be together enough that when filled with dirt, they can hold together as a solid wall.  If, however, you are not comfortable enough to use the tires, there are other options that can be used.  Some, we're going to look it in the coming weeks as independent building styles.  Just remember that other things must be considered with some of them.  For example, you may need an extra space behind that wall for air to flow as a mold/mildew prevention.  Or you may need a layer of insulation between the wall and the moisture barrier.  Just a few things to keep in mind.


The other controversial aspect of earthships is the window wall.  Now, I've only seen this mentioned in one place, but I think it bears mentioning.  If you are building in an area that doesn't deal with snow loads or things of that nature, you may not have to worry about this one.  However, there is some concern about snow loads laying on a slanted wall of windows.  The heavier the load, the greater the possibility of window cracking/breaking and causing damage to the interior of the home or to anyone unfortunate enough to be standing beneath them when they break.  The reason the windows are slanted in the first place is for optimal light/heat into the home (passive solar).  Personally, I believe this can be resolved with only a slight slant, if any at all, and make sure that the windows are good quality, and are installed correctly.


Most early earthships were quite the sight to see.  Some would even go so far as to call them ugly.  There are some that are somewhat less than aesthetically pleasing.  However, as the idea has garnered more fans, the designs have become as varied as the people that live in them,  This is a bonus, not only with earthships, but with green building in general.  They can be completely unique and personalized.


Another bonus of earthships is the design with an interior greenhouse.  If you live, or are planning to live in a climate where traditional gardens are not possible for a good portion of the year, this makes it possible.  There are some earthships built as far north as Canada which have been known to grow tropical plants within these earthships.  According to some sources, just about anything can be grown inside one.


I will say that through all of my research, the basic idea of an earthship is the route I plan to go, only with a few changes and tweaks.  I'm also planning on using some cob and earth bag techniques in the design.  And maybe a few others.  I believe this design would work well with solar, wind, hydro, or especially the plant based energy systems.  If you are interested in building one of these unique homes, or just want to learn more about them, I highly recommend the website http://earthship.com/.  You can look at floor plans, learn more about the techniques and the man who designed them, schedule a trip to go to New Mexico where they originated to stay in an earthship, learn how to build them hands-on, hire one of their teams to build your earthship for you, and so much more.


Earthships have been built all around the world.  They are relatively new in the green building line-up, and have (and still do) receive a lot of scrutiny both from traditional sources, as well as others within the green building community.  While the concept of using recycled and readily found materials to build your home is a beautiful idea, there are, I think, still some improvements to made.  That being said, I do believe earthships are a good and viable option when looking into green building.  In addition to the official website, there are tons of other sites all over the internet that can provide valuable information.  Not being from the official page, they list pros and cons, the nuts and bolts of what's involved from the perspective of some who have built them, resources, and more.  There is too much information for me to be able to cover it all, so I leave you with a list of really good places to start your research.

http://www.offgridquest.com/index.php?/homes-dwellings/teds-little-house-is-a-modern-looking-ea

http://www.bluerockstation.com/earthship

https://permies.com/t/22562/earthship/tires

http://www.ecosnippets.com/diy/how-we-built-our-earthship/

http://www.treehugger.com/sustainable-product-design/how-to-build-an-earthship-step-by-step-slideshow-video.html

http://www.motherearthnews.com/green-homes/building-an-earthship-zmaz05amzsel.aspx

http://highexistence.com/10-reasons-why-earthships-are-fing-awesome/

http://www.greenhomebuilding.com/QandA/earthshipQandA.htm

http://secondhandhomeproject.blogspot.com/2014/09/how-much-does-it-cost-to-build-earthship.html

http://www.survivalparadise.com/incredible-earthship-mansion/

https://www.toptenrealestatedeals.com/homes/featured/2011/the-top-ten-weird-but-wonderful-homes/10/

http://earthshipvillagecolorado.com/category/models

http://www.rockymountainsustainabilitycenter.org/in-the-news/


Monday, September 12, 2016

Homestead Water: Collection and Grey Water Systems

How are we doing so far?  In case you are new to the blog, let me catch you up.  I'm writing a series of posts specifically designed for those who want to build and live in an off the grid homestead, but have absolutely no idea where to start.  And all this from someone who was in the same boat before I started doing research.  Having lived in a "normal" home my entire life, I knew very little about running a homestead.  But I know it's what I want.    So I started doing some research, and that has led me here.  I want to share what I've learned with others in the same frame of mind, but maybe just don't know how to go about it.  So here we are.  All caught up?  Good.


Well, we've talked about temporary housing and various types of alternative energy for your homestead.  So what's next?  Water.  This week I'm talking about water- from collection to system.  And no, you don't have to be a plumber to do this.  Ok, so it might make things a bit easier, but it's not necessary, unless there are codes in your area which dictate that it's done by a professional.  I know how to unclog a drain and how to change and repair the pipes under a sink. That's about it.  But the truth is that when you are building your own home from scratch, it's a relatively simple process.  But let's start at the beginning.

Where does your water come from?  Of course, you can connect to a city water supply.  But if you truly are wanting to go off the grid, that's probably the last thing you want to do.  So you need to find somewhere else to obtain your water.  Now, before I go any further, please- and I can't stress this enough- know what the laws are in the area where you will be building.  Believe it or not, there are a number of places where how you obtain your water is strictly limited.  There are states, counties, and cities and towns all over the U.S. where it is actually illegal to harvest rainwater.  Yes, they have their "reasons".  Personally, I think it's insane and an incredible overreach of power and control.  They simply don't make any sense in any other context.  There are also places where it is required that you are hooked up to city water and power.  Again, I think this is insane.  Common sense would dictate that it would be less of a drain on both water and power sources if individuals were not only allowed, but encouraged to run on their own power.  Another overreach?  I think so.  And if you want to be completely off grid, you might be better off finding another piece of property in an area that doesn't have these laws.  However, it can be beneficial and work in your favor, if you don't mind still having a bit of attachment to the grid.  Most power companies are required to buy back any unused power.  Therefore, you can not only create your own power without an electric bill, but you could actually make a little cash back in the process.  Sadly, there's nothing set up like that for water, so far as I know.  But once you know whether or not your area has any of these laws, make sure you also read them carefully.  They may be set up to only limit one kind of water collection.  And, yes, it may take a lawyer to determine whether or not a loophole may work in your favor, but it may just be worth the effort.  That being said, let's look at types of water collection.


The most commonly known type of water collection is rain barrels.  Sadly, this is also one of the main types of collection that is illegal in those places I referred to above.  But it is one of the easiest set-ups, as well as one of the least expensive.  Make sure that you have some type of gutter and downspout system attached to your roof.  Then it's a simple matter of placing a barrel where the water comes through the downspout, and directly into the barrel.  Beyond that, the set-up can vary.  Choose your barrel, choose your downspout (a rain chain is a beautiful variation on a typical downspout, and much more visually appealing), and then determine how you want to use the water you're collecting.  Some of those laws up above also dictate whether or not you can use collected water for interior use, or specifically for outdoor use only.  The general setup is to have a spicket of some kind attached to the bottom of the barrel from which the water can be withdrawn.  For outdoor use, a basic outdoor faucet that you can attach a garden hose to should be installed.  For interior use, the set-up is similar, but you may want to include some sort of filtering system, both inside of the barrel itself, as well as inside a secondary barrel or some other container.  For most purposes, a combination of sand and charcoal can be used as a filter.  You will also need a pump in order to get it to all of your interior faucets and whatnot.  While this is a very simple option, if you have a larger family where more water is just a matter of fact, then you may have to set up a series of barrels, or consider another method of collection, as the barrels do not hold much.


Similar to the barrel is a water bladder, or even a cistern.  The connections and basic set up are virtually identical to barrels, only these two options are larger for holding greater amounts of water.  Bladders, for example, can be as small as a handheld bladder for use when hiking, to as large as 10,000 gallon capacity.  And, of course, you will need more space in which to set these up.  The difference is whether that space is vertical or horizontal.


Next, something that is a bit of a newer idea, is that of a fog catcher system.  There are a few different variations on this idea.  See here, here and here.  This system would be one that could possibly be used in areas where other options are illegal.  It is an excellent choice in areas that don't get much rain.  Basically, a netting is set up that harvests water straight out of the air.  Think of morning dew on the grass. It shows up even when there is no rain.  That is the type of water that fog catchers harvest.  And along those same lines, is the Warka water tower.  It is a much larger structure, and is even being used in arid places such as Africa.  While Warka is a specific company, the idea is simple enough to be able to build something similar on your own.  With either of these options, you will still have to have something for the water to fall into once it has been collected and condensed.  So you may still end up using one of the containers already mentioned.

Finally, there is the relatively obvious option of drilling a well.  If you're lucky, you may be able to find a piece of property that already has a well.  If not, be aware that this could be quite costly, especially if you have to dig fairly deep.  And, by all means, make sure you have water rights on your property.  It's hard for me to believe, but it's not always a given when obtaining property.


Once you have your water, how are you planning on using it?  For me, I like the idea of installing a grey water system.  The gist of this kind of system is that you harvest your water, but then you can reuse it.  From the point where you collect your water, it goes into sinks, showers, and possibly even your washer.  From there, it goes into any interior plants, and then to your toilets as grey water.  Then, as black water, it goes out to any outdoor plants.  The plants themselves act as a type of filtration system.  I like this concept because you still have enough water for every purpose you might think of, but it uses less than a traditional system.  It would also be easy to use in conjunction with a hydro power system.  You could even set it up with a radiant floor heating system, or even an aquaponics system.  For me, this is a no-brainer idea.  There's just too many benefits to using this type of system.  For a few places to start your research on grey water systems, here are a few good resources.
http://greywateraction.org/contentabout-greywater-reuse/

https://sustainablebuildingdesign.wordpress.com/2014/05/28/lct-greywater-systems/

http://greensmartsc.com/greywater-systems/

http://www.survivopedia.com/reusing-grey-water/

http://naturalhomes.org/permahome/gray-water-systems.htm

If this seems like a simple procedure , well, it really is.  Don't let yourself become overwhelmed.  This may actually be one of the easiest decisions you will make during this entire process.  Enjoy a little simplicity when you can.  But as always, when in doubt, consult a professional.  It's never a bad idea to have a back-up plan.


Monday, September 5, 2016

Homestead Energy: Save as Much as You Can

After the past several weeks of discussing the various types of alternative energy that you could potentially use for your homestead, one thing has been left untouched.  That is "How do you know how much energy you use or need?" That's what I want to discuss today.  Not just figuring out how much energy you currently use, but also various ideas to help cut down on that.

Beginning with the obvious, if you want to go truly "old school" for an incredibly simple lifestyle, there's no need to even worry about any of this.  Go Amish, so to speak.  Live by the sun, no electricity, everything done by hand.  If this is your aim, then by all means, all respect to you.  I couldn't go this route for a few simple reasons.  First of all, I am a night owl.  It's just the way I'm wired.  I have tried and tried in vane to change.  I just can't seem to function any other way.  As a result of that, I need light at night.  Candlelight is beautiful, and has it's place.  But I don't know how feasible that would be on a long term basis.  Beyond that, I have an online business.  I kind of need the internet for that.  That, I may be able to change over time.  But for now, it is what it is.  But even still needing to have some kind of electrical connection, there are ways to drastically cut down on the amount of power you use, and thus, potentially altering the type of energy source you will ultimately decide on.


To get a baseline of what you currently use, the best way is to simply look at your utility bill.  Now, depending on where you are and what is included on that bill, you should be able to determine how many kilowatt hours per month are being used.  You must also think about what it is that is eating up that electricity.  To put it into a little perspective, the number one eater of electricity is central heat/air.  Number two is generally the water heater, followed by the refrigerator coming in at number 3. Then, think of things like your computer, television, radio, or anything else that uses electricity.  Obviously, anything plugged into an outlet eats power.  But did you know that keeping something plugged in, even when it's turned off or otherwise not in use, still pulls power?  Power strips can and do help.  But if there's a plug in an outlet, it's pulling power.  This is called phantom power.  And while it may not seem like a lot, it can add up quite quickly and easily if you're not careful.  A single random plug may not even be noticeable.  However, the more things you have plugged in, the more it can add up, sometimes even up to $20 - $30 a month on your bill.  So while it may be a bit inconvenient, it's always a good idea to unplug everything that is not being used at any given time.

Of course, we all know about energy saving appliances.  Those are definitely a great option to help cut down on your energy usage.  You still might want to unplug those when not in use to limit that phantom power.  But there are options beyond those, as well.  I'm going to cover a few of those here.  Other ideas that can be used in cutting energy uses will be discussed later on when I start discussing the various options for the building of your home, itself.  So let's look at some of these other options out there for saving energy.


If you want some modern conveniences but don't mind a bit of work, try  something like a bicycle powered washing machine.  The loads tend to be smaller than a standard machine.  But that can be customized.  There is a version or two that you can get your hands on for a price.  But why not build your own?  Take a container of whatever size you decide, and hook it up in place of the rear wheel on a standing exercise bike, or as an addition behind the rear of a regular bicycle.  Either way, every time you pedal, you turn the drum.  Add a bit of water and soap, and you have a washing machine.  Drain the soapy water, fill with clean water, pedal again, and rinse.  Easy breezy, right?  There a tons of tutorials building different versions of these things.  Then air dry.  If you really want to up the ante, use this option in conjunction with the pedal powered electricity.  Or, if you would rather not pedal your clothes clean, there is this option of this tiny trash can looking gadget.    Then there are these options.  Get creative here.  It's really the same basic concept, only a different way of moving the water.  Any of these, while using muscle power instead of electricity, land somewhere in the middle between the old fashioned scrub bucket, and the modern machines most of us are used to.  And, even when used alongside air or line drying, no electricity is required.


There is this wonderful idea for washing dishes.  In all honesty, doing the dishes is one of my least favorite things to do.  Paper plates isn't exactly ideal for a number of reasons, so I really like this idea.  Dishwashers, to me are a waste.  They waste so much water, it seems almost ridiculous to have one.  At the same time, it's not always workable to do the dishes by hand, especially if you are cooking for more than one or two people.  That's where this gem comes in handy.  Basically a hand-cranked dishwasher, it's light, it's easy, it's fast.  Cut down on the amount of water used, while using no electricity.  I can see that if you have something really stuck on, this may or may not work, and a little soaking might be needed.  Otherwise, I really love this idea.


Cooking.  I love to cook.  But even an energy saving oven has it's issues.  It's a complete waste if you are cooking for only a couple of people.  For myself and my son, a simple toaster oven does the work nicely.  While not ideal for everyone, I personally like the idea of a wood burning stove.  You may not have much control over the heat, but personally, I like the resulting flavors much better.  Depending on the design, they can have a number of compartments for cooking different things at the same time, some have a separate bread warming area, and there's even the possibility (like with the pedal power) of using it while also creating electricity for your home.  Now while a good wood burning stove may set you back a bit in cost,  you can get a lot of the same benefits from building your own cob oven.  Generally seen outdoors, they can also be use indoors with adequate ventilation.  A solar oven is a very good option, although it may take a little bit longer.  Buy one if you like, or build it yourself.  They're not difficult to make.  Or, so long as you're not wanting to cook anything huge, the GoSun is excellent.  And again, no electricity whatsoever.


Referring back to the top three energy suckers, let's look at number 3- the refrigerator.  Energy saving appliances included, they still suck energy.  Every time the door opens, the light comes on, cold air rushes out, and warm air rushes in.  And then the motor has to kick in to rebalance the temperatures.  No matter what else is going on, that's the basic set-up of he common refrigerator.  But what if you could have a refrigerator, even larger than the one that is currently in your home, but ran literally with no electricity?  Sounds to good to be true, doesn't it?  Well how about this?  It's more or less a modern take on a root cellar.  It's large, and it keeps your food at the ideal temperature.  The only caveat is that it must be placed underground.  If you were to add this to an existing home, it would require either a bit of (potentially expensive) remodeling, or a trip outside any time you want something to eat.  However, if you are building your homestead from scratch, you can easily integrate it into the design of the home.  The same basic idea, but on a much smaller scale, is this container that can easily be built by just about anyone.  Or you can support the entrepreneur who created this.  And not one of them requires a bit of electricity.


Now, what about that water heater- energy sucker number 2?  By now, we probably all know about mass-produced solar water heaters.  They've been on the market for several years now, but can still cost a pretty little penny.  But there is always the option of building one yourself.  There are so many ideas and instructions out there for various ideas when it comes to DIY water heaters.  You can do pretty much anything from adding solar panels to a traditional water heater, wrapping copper coils filled with water around a heating element, such as the exhaust pipe from a wood stove, running the water pipes/tubes under a pile of compost,  or any number of designs similar to this.  These ideas can be used for everything from heating water for our shower, to running through a radiant heated flooring system.  The size of your tank(s) and pipes/tubes all depends on how much hot water you need.  But then, you could always forego any of that, and either just use cold water (burr!!) or heat it up over a fire, bucket by bucket, just as they did in the days of old.  No?  I don't blame you.  I wouldn't want to follow through with either of those options, either.  But any of the other options mentioned above can get the job done, some, fairly quickly, and again- not requiring a bit of electricity.  For other options, look here, here, here, or here.


Now for the gigantic elephant in the room.  That number one energy sucker.  We all want to be comfortable.  It helps us sleep better, work better, think better, and just overall function better.  Too hot or too cold, and you just don't feel like doing anything.  But even here, there are ways to drastically cut your energy consumption.  The best place to start, I think, is utilizing passive solar energy.  This may not always be an option, but if you get to choose your property, and the location of the house on that property, then you can make it so that passive solar is an option.  Now what this does, is that it utilizes the position of the sun to aid in heating/cooling your home.  Orient the home so that there is a large bank of windows directed towards the equator for greater exposure to the sun.  Meaning that if you live in the northern hemisphere, you'll want a southern facing view.  Or if you're in the southern hemisphere, you want that view facing north.  The key is that you also want a good overhang on those windows, and here's why.  In the summer, the sun rides higher across the sky.  The closer to noon, and the more heat coming down, the less it will come into your home if there is an overhang or some other form of shade over those windows.  By the same token, in the winter, the sun rides lower in the sky.  Those windows being aimed towards the equator will increase the duration of the sunlight that comes in, both keeping artificial lighting to a minimum, as well as using the heat of the sun to warm your home.  Along those lines, have you seen this house that actually rotates around to follow the sun?  Pretty cool, although maybe a bit more maintenance in order to keep everything running and moving smoothly.  If you live in warmer climates, there are number of ways to keep cool, from fans, airflow design, diy air conditioners of just about any size, to even this simple idea of cooling off your air.  Or how about a 3D printed "cool brick"?  On the other side of the spectrum is keeping warm in cooler climates.  This could be something as easy as sitting in front of a nice warm fire, to heating the air throughout your home with one of these homemade air heaters, using radiant floor heating, or even the idea of a building material that not only absorbs and retains heat as the sun shines on it, or as fire warms it, and then it slowly releases that heat out into the home over time.  Cob and adobe are both excellent natural examples of these types of materials.  Rocket mass heaters/stoves are also a very good option.  Or there are these glass tiles.  Now while glass tiles have been around for years, this system is designed specifically to capture heat, and move it throughout the home.


As you can clearly see, there are many many many options out there for ways and methods of cutting down on your energy needs.  And what I've mentioned here is merely scratching the surface.  There is even this contraption that uses gravity to power a light bulb.  I know I've said it many times before, and I'm very certain that I'll say it many times again in the future, but the only limit is your imagination.  This just flies across the board.  If you can dream or envision it, then you can make it a reality.  Yes, you will need some sort of electricity if you want to have internet, television, or anything like that.  But in almost every other way, even when it comes to the most energy consuming products on the market, you can actually cut your usage down to almost nothing.  And in cutting down your energy consumption, you cut your expenses in whatever alternative energy system you decide to implement.